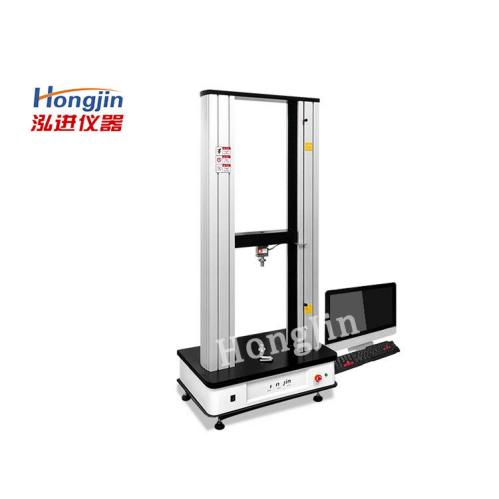
The electronic universal testing machine is mainly suitable for testing metal and non-metallic materials, such as rubber, plastic, wires and cables, fiber optic cables, safety belts, belt composite materials, plastic profiles, waterproof rolls, steel pipes, copper profiles, spring steel, bearing steel, stainless steel (such as high hardness steel), castings, steel plates, steel strips, and non-ferrous metal wires in terms of tension, compression, bending, cutting, peeling, tearing Two point extension (requiring an extensometer) and other tests. This machine adopts an electromechanical integrated design, mainly composed of force sensors, transmitters, microprocessors, load driving mechanisms, computers, and color inkjet printers. It has a wide and accurate loading speed and force measurement range, and has high accuracy and sensitivity in measuring and controlling loads and displacements. It can also perform automatic control experiments for constant loading and constant displacement. The floor standing model, styling, and painting fully consider the relevant principles of modern industrial design and ergonomics.
simple and fast method for verifying electronic universal testing machines:
1. Power testing of electronic universal testing machines
After entering the computer program of the electronic universal testing machine, open the calibration interface and press the test start button. Take a standard weight and lightly hang it on the fixture connection seat, record the force value displayed on the computer, and calculate the difference with the standard weight weight. The error should not exceed ± 0.5%.
2. Speed inspection of electronic universal testing machines
(1) Firstly, record the initial position of the cross arm of the machine and select the speed value on the control panel (measure the cross arm stroke using a standard straight steel ruler).
(2)At the same time as the starter, the electronic stopwatch starts counting for one minute. When the stopwatch reaches the time, press the machine stop button. Based on the stopwatch’s time, record the cross arm travel value as the rate per minute (mm/min), observe the difference between the cross arm travel value and the straight steel ruler, and calculate the cross arm travel error value, which should not exceed ± 1%.
Methods to avoid positioning errors in electronic universal testing machines:
The electronic universal testing machine is required to conduct performance tests on tensile strength, tensile strength, tensile break strength, elongation, elongation, shear strength, and yield strength of aluminum alloy profiles under conditions greater than 35 ℃.
In daily use, positioning errors are common, and different chucks can be designed as fixed axes. Some testing machines also have a stable chuck for testing, which has a fixed gap for movement. In order to better stabilize the chuck, we can add a sleeve ring and other fixtures to the chuck configuration, as there may be resistance during processing and assembly, Once there is resistance, it is also easy to wear out, because it is easy to be affected by resistance and wear during processing and assembly, so there will be a certain error in axial positioning. We can keep both the upper and lower sample heads on the same axis, and the center of the shaft cross-section is not concentric. Moreover, its sample heads are also prone to parallel, indicating an S-shaped shape, The sample head of the axis has a certain degree of angular adaptability, but the upper and lower axes do not need to overlap, so there will be no bending problem in this section
In addition, when operating an electronic universal testing machine, whether it is an upper or lower material, there will be related requirements. Therefore, when using such a chuck, these control devices must be taken into consideration, and other testing machines also need to add a chuck product on the inside. This has a certain amount of activity gap. In order to ensure better control and firmness of the tested product, we can also add a symmetrical sleeve ring product, which can be processed and assembled, and can also reduce the risk of wear and tear. Such products will definitely have errors when positioning coaxially. This type of machine is very stable in form, and its upper and lower axes are kept parallel, The center of the axis is not concentric, and there is also a risk of parallel displacement when testing the lower part. The material of this marked part is like an S-line product, and each product’s sample head has an adaptability, but the upper and lower axes will not overlap.
Post time: Jan-31-2024

